Welcome to my life . . . .

This is a blog about my passion: dollhouses and miniatures. This particular blog was started to follow my miniature dream: to create a Victorian Mansion. But work on my Mansion is slow. Very slow. Sloth slow. Ice Age glacier movement slow. Why? Because I am easily distracted by other personal miniature projects (I have 50+ roomboxes and 15 dollhouses in various stages of incompletion) and because I work for a miniature shop and am often up to my elbows in miniature projects that aren't mine! So, I thought, some artists work in a particular medium (woods, watercolors, clay, oils, etc.), I work in progress . . . .

Friday, October 21, 2016

Pumpkin Crazy (Part 2) & "Water" Update

So the broken pumpkin inspired "Mr. and Mrs. Killjoy's Residence" (a scene suggested to me by my sister-in-law).  First Mr. and Mrs. Killjoy ruined Independence Day by calling the cops on the neighbor who was shooting off the "good" fireworks that are banned in their state; then they convinced the HOA to cancel the Dog's Pool Day after Labor Day when the pools were scheduled to be drained; and now they were messing with Halloween!

I had some left over pieces of wood from a prototype of one of my Door Series Bookends (classes being offered at my miniature shop) so I used them to create the small space that would be the exterior of the house, door, and front yard of Mr. and Mrs. Killjoy.  I used paint and static grass to create the yard and sidewalk leading up to their front door:
Had to glue my plastic tree down first so I could cover it's white "winter" base with paint and grass.

Gotta yard!
After I sprinkled the "grass" onto the wet paint, I sprayed it lightly with adhesive spray to help keep it in place.  I removed the blue painter's tape and painted the sidewalk (yes, this would have been easier to do BEFORE I applied the grass -- hindsight is 20/20).
Painting the sidewalk
The toilet paper in the tree is gift tissue paper cut into strips.  The "rolls" were simply glued around a coffee stir straw and cut to be toilet roll size.  Then I added the bush, step and door.  But why would teenagers destroy Mr. and Mrs. Killjoy's only Halloween decoration (a carved pumpkin) and teepee their tree and egg their front door?  A picture is worth a thousand words....
That sign didn't win Mr. and Mrs. Killjoy any friends
I still have to create some egg shells to scatter at the bottom of the door but here is how I created the "egg" splatters on the door:
Dripped some yellow, clear, and "frost" color nail polish on a plastic sheet
Some looked better than others...
Once they were dry...
...I could slide my fingernail under them and...
...they'd pop right off to be glued where ever I wanted them.
The QuickGrip glue actually began to disintegrate the nail polish creations which made them look more realistic/haphazard when I applied them to the door and bricking.  Overall I had fun creating this little scene out of left over bits and parts I had lying around the house (except the door and bush: those I had to buy just for this scene).


Next blog update will still be pumpkin related as my witch is getting her pumpkin scene finished in time for Halloween!

Also, for those wondering and waiting: it's been 2 weeks and the water effect products are still under scrutiny...
From a distance...
From 12" away (or even further back) all the waters look good!  Any and all of them look like realistic birdbaths, except maybe the water in the painted bird bath -- it appears as though the blue paint is just glossy at first glance and you don't really see "water" in the basin.  However, the photo above is taken indoors under "normal" lighting.  Once I put them into sunlight, they didn't look quite as realistic/good:
The bubbles really show now
Scenic Water (top left in photo above) really shows the bubbles in the sunlight creating shadows throughout the bird bath.  The EnviroTex Pour-on (lower left and upper right painted birdbaths) looks cloudy with bubbles.  And the Solid Water (lower left) has a tie-dye effect going on...

Up close (back under "normal" indoor lighting again) you begin to see the minor issues that are highlighted in natural sunlight and these issues were present when I first poured the products into their respective bird baths:
Scenic Water
Scenic Water: Glad to see my bubbles at the side of the basin are still there and are clear (they didn't "pop" into a gooey mess).  Several smaller bubbles are noticeable across the surface but they are not as distracting in "normal" lighting as they are in bright sunlight.  These smaller bubbles formed when I poured the product into the basin.  "Water" is clear, but definitely seems to have a yellow hue but so does one of the other products so maybe that is a reflection of the paint(s) in the basin and not the product.

Solid Water
Solid Water: Definitely reacted with the paint(s) of the basin and created a tie-dye effect at the bottom.  This "water" has a yellow hue too (like the Scenic Water).  A milky swirl formed at the gnome's feet; not sure why or when that formed (I'd have to go back and review the first photos to see if it was there and I just missed it).  Not one bubble anywhere!

EnviroTex Pour-On
EnviroTex Pour-On: From a distance it seems the "clearest" but up close the millions of bubbles creates a hazy foggy appearance.  These bubbles are partially operator error as I stirred the two compounds together quite vigorously to make sure they were mixed, creating a large majority of the bubbles now present in the basin.
EnviroTex Pour-On in Painted Basin
EnviroTex Pour-On in a Painted product: Again, from a distance it seems to be one of the "clearest".  In fact, the water is barely recognizable from a distance and it appears as though the blue paint was maybe just a high gloss finish.  Upon closer inspection you can see the thousands of bubbles (I didn't mix this batch as vigorously as the previous birdbath's water).  But it is not as hazy looking as the other EnviroTex Pour-On birdbath (however, I think that is a result of either the fewer bubbles or the painted bottom, but that would bode well concerning this product's characteristics).


None of the "waters" have cracked or shrunk/pulled away from the edges (yet?).  Another update will be posted as more time passes...

Friday, October 14, 2016

Pumpkin Crazy (Part 1)

Yes, this post is part 1 of who-knows-how-many Halloween themed posts because my craziness comes in stages...

I have an unfinished witch scene that needs a pumpkin. But I'm not happy with just a pumpkin; I want one that's carved AND lights up. I have not found a realistic looking carved pumpkin that I could add an LED light to, so I thought I would just make my own. This was a scary for me as I have never used FIMO before.  Don't get me wrong: I've collected over 3 dozen FIMO packages in various colors. But I have never actually created with it before.

Step one was rolling up aluminum foil balls to wrap my FIMO around (a tip I read about on a FIMO advice website regarding crumpled aluminum foil as a filler center for beads). This hurts after about the 4th ball! And why is it so hard to get a decent size and shape?!?!?

Step two (which took about 45 minutes) was massaging the old, dried-out, hard, unknown-orangish color block into a softened clay and mix it with a recently bought 033 Sweet Potato color block.
Trying to match the color and shape of the resin pumpkins in the background
I did research and found that adding just a drop or two of baby oil softens it up a little bit (or at least it made my hands feel nicer after that rough job of rolling the tin foil and now all this kneading).

Step three was wrapping the tin balls with the orange FIMO.
Using a needle I drew little lines to simulate a pumpkin. I forgot that my FIMO would add up to 1/8" onto each side so now my perfect sized pumpkins are much larger than I had anticipated. Well, she's a witch so she used a miracle grow spell on her pumpkin patch, right?
Okay, maybe they aren't too large: they'd be about one foot in diameter in real life...pumpkins are that big, right?
Step four: baking! I've never been great at cooking. I do okay. But no fluffy light meringues or souffles or perfectly prepared steaks have ever come out of my oven. But I was hopeful my clay pumpkins would come out decently as FIMO's directions on my box were very simple: "bake at 275°F for 15 mins per 1/4" thickness". Hmmm...that is contrary to my research that says cook FIMO at 230° F for 30 mins/quarter-inch-thick.
I used disposable tin pie pans clipped together to cook my FIMO in. I don't remember where I saw that (probably on that FIMO advice website) but I liked the idea of containing any smells in a container instead of throughout my oven and house.

I did 230° for 15 minutes for my less than 1/8" thick FIMO pumpkins. I'm a gambler so we'll see if that works. (And now you know why no meringues or souffles or perfectly prepared steaks come from my cooking abilities.)

Step 5: After letting them cool for a while, it's time for cutting faces! (Let's not take that sentence out of context!) Eyes and nose cut alright. But while cutting the mouth, bits between the mouth and nose chipped off. Thus my face became just a mouth and eyes.
I continued "carving"...
It became obvious to me by now that my FIMO has issues. I'm not sure if my over-a-decade-old, unknown-orange color, remoistened-with-a-drop-of-baby-oil FIMO is causing the issue or if I baked the pumpkins too long or not at a high enough temperature. But it is brittle, and fine cracks are appearing around where I am "carving".  It's a carved pumpkin though, so I am happy!

Step 6. Time to use my forceps to pull the tin foil out. What? This tin foil stuff doesn't come out easily!  Tiny pinched bits get broken off at a time. Ten minutes later and I've hardly made a dent!

After many minutes (30? 40?) I was able to get the majority of the foil out. But the last large chunk caused the smaller stress fractures to crack completely.


Now I'm left with pieces. Well, when life gives you lemons (or smashed pumpkins), make lemonade (or a whole new miniature scene to go with the smashed pumpkin)!
Made Mr. and Mrs. Killjoy's residence

My sister-in-law suggested I use the pumpkin in a Halloween vandalized scene (Thank you, Ashley!)...thus the Killjoy's residence was born and their pumpkin was smashed by the neighborhood kids...
Door is "egged" by the over 8 crowd
More on Mr. and Mrs. Killjoy next time in Pumpkin Crazy (Part 2) once their residence is fully finished!  And, don't worry, my witch does get her pumpkin as well (Pumpkin Crazy (Part 3) coming soon)!

Sunday, October 9, 2016

Recovering & Struggling with Mojo

I disappeared for a while.  I didn't mean to.  I had been feeling poorly on and off since last year and in January/February 2016 it became a constant pattern.  Spent months doing various tests and the diagnoses kept piling up.  Surgery was scheduled and then there were complications from the surgery.  End result was that my vision of sitting around, sipping coffee, creating miniatures, while I recovered was a fairyland pipe dream.  Real life involved more tubes, IVs, pain killers, soreness, and exhaustion than I ever imagined!  And, when the tubes, pain killers, etc. did leave, the energy and mojo to mini did not return!  Very frustrating.  But it's finally creeping back and last week I painted 2 pieces of wood and this past week I experimented with some water effects!

In the Spring I said I was going to experiment with various water products because I have had friends lament over using some that then turned yellow, cracked, separated from their project, etc.  So I wanted to play with some.  The only one I had used before was Scenic Water (by Deluxe Materials).
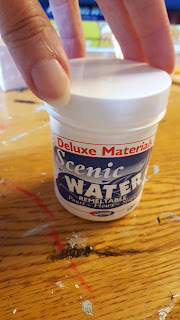
I've used this a lot of times but will admit I was not happy with it.  I had filled a miniature rain barrel with it and years later it looked awful. It pulled away from the edges of the rain barrel a little bit.  Plus dust got on it and I can't get the dust off.  Luckily the scene is an abandoned cottage so it doesn't upset me too much that the water looks awful.  I do like this product and how easy it is to use.  Remove the lid and warm (directions suggest in a pot of hot water but I took a class about how to use Scenic Water about a decade or two ago and the representative from the company said you could warm it in the microwave in short 10- to 20-second intervals; So, that's what I do to liquidize the substance).  I do wonder about this product though when even warming it up it is not a clear liquid:
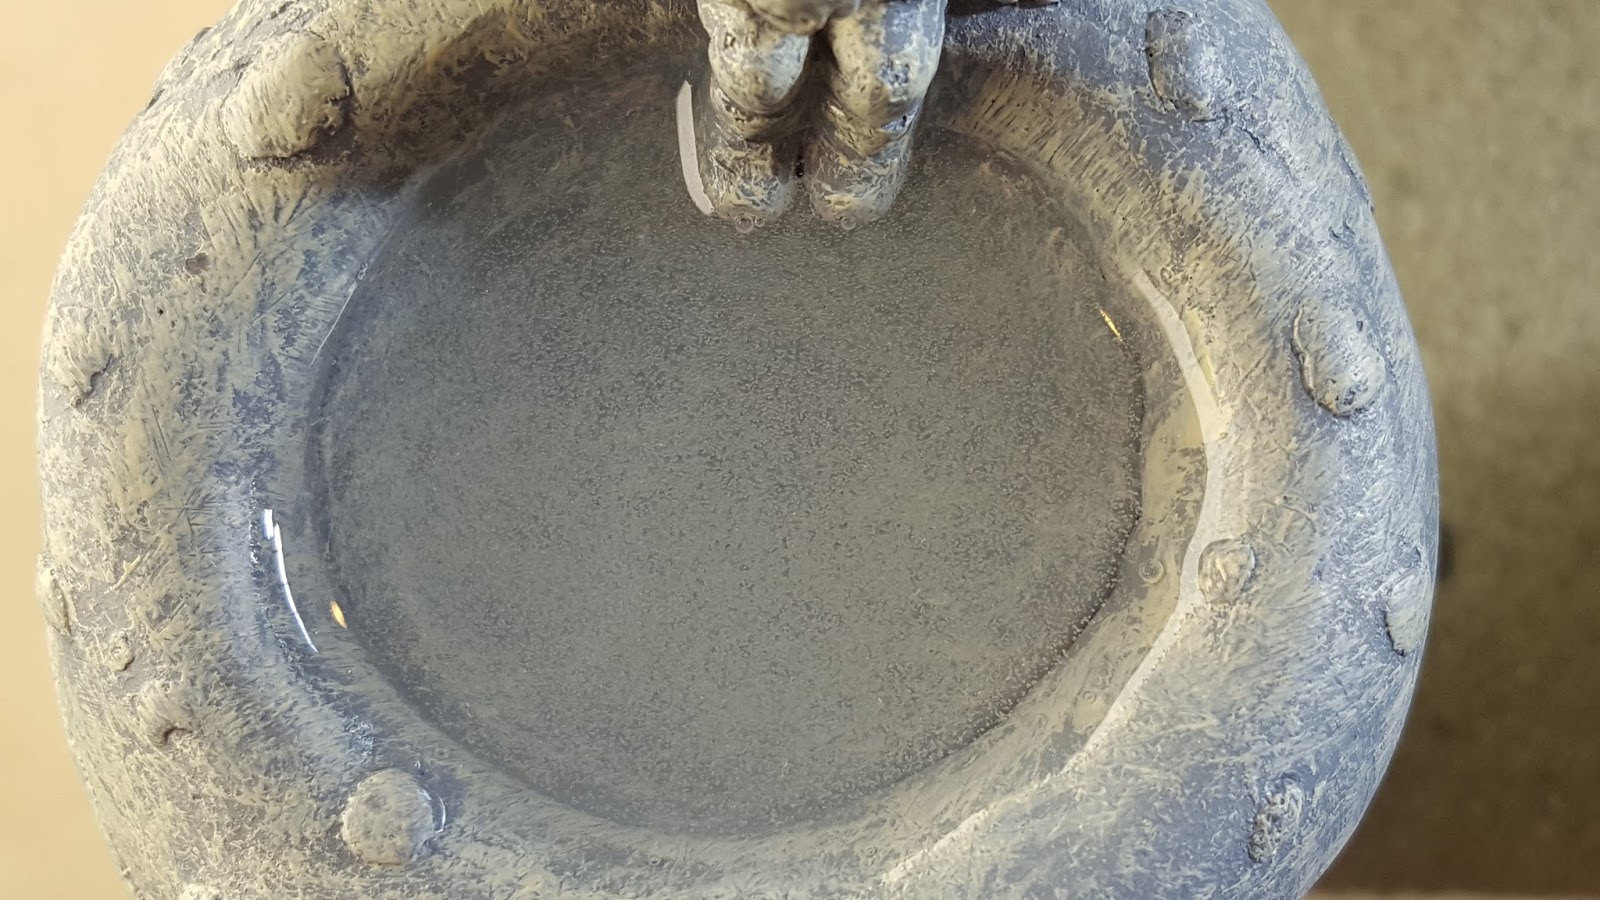
The nicest thing about this product is that if you don't like how it sets up you can remove it from your product and reheat it to liquid form and try again (providing you did not add something to it like a painted fish or flowers or spray it with a sealant that will alter the chemistry when you warm the stuff back to liquid form).  So I poured this into my bird bath....
Wasn't happy with the bubbles that appeared but was able to pop some and move the others with a toothpick...
Bubbles all around the middle of the bird bath
Moved them to one spot on the right, near the edge
I was happy to see that the "water" was clear when I poured it even though it had been yellow in the container.  We'll see if it stays clear as the weeks turn into months....

Next up was another Deluxe Materials product called Solid Water.
I had never used it before.  And I got very nervous when I opened the box and found this inside:
This is a lot more work than just microwaving a container like their other product.  But, I had used another product similar that involved mixing two ingredients so I followed the directions and poured it into it's birdbath:
Clear and no bubbles!  Nice.  Now to see how it holds up over time....

Then came a product I helped a friend use back in April (Last paragraph of this post talks about the "water" product) called Pour-on (by EnviroTex):

Again, this is a two part mix combo but they don't supply the measuring tools like the last company did.

Was highly disturbed by all the bubbles that formed while stirring (although directions say that blowing across the surface of the "water" will break these bubbles)...
Was also concerned because directions say to pour only 1/8" depth at a time. And my birdbaths are about 3/16" to 1/4" deep. I'm not going to have the patience to do this twice! Certainly not when I have to wait for a day or two between applications! I'm in the mood now, I'm doing it all at once.
I poured it into my birdbath and sure enough all the little bubbles went with it.

Microscopic and visible bubbles fill the birdbath! After using a toothpick to stir and blowing across the surface until I was light headed and dizzy, most of the larger visible bubbles were gone:

So I poured this into a birdbath I had painted over the summer to see how it would look with a painted backdrop.
Same issue with bubbles occurred.  Luckily same procedure worked and most bubbles are gone now.
It's only been a day or two so they still have a ways to go before I'll know which stands up better over time. So far the Solid Water is having a reaction to the paints on the birdbath or with the material the birdbath is made out of as the speckled bottom of the birdbath have become cloudy streaks...
...You'll see these again as we check back on them throughout the future.

In the meantime, my miniature mojo is back and it's the perfect time for me to tackle my Halloween project from years and years ago: my carved pumpkin!