This project started out as the Raw Chicken Country Kitchen: a little diner that served mostly breakfast foods, such as eggs (raw chicken = eggs? not really, but, whatever, I'll think about that later). This chicken-themed diner (to accompany my whole "street" of animal themed shops) was a small space so I wanted to give the illusion of a kitchen without having to create an entire restaurant kitchen. I printed a lunch counter scene off of Google and thought it would work framed out on the back wall...
 |
| Maid is from mansion, but gives a good height representation for the kitchen scene |
I also took out all my chicken themed stuff and had the realization that a lot of it was rooster related. Thus the Raw
Chicken Country Kitchen became the Raw
Rooster Country Kitchen. (Wait, do roosters lay eggs? Hmmm, no. So not sure that Raw Rooster is a good name....oh well, I'll think about that later.) Framed out the kitchen scene to focus strictly on the pass-thru section...
 |
| This looks supremely bad |
Yuck, no. It's really small (1" x 3"), which I liked at first because I wanted the viewer's eye to focus on the diner (booths, foods, chicken themed items on the shelves); I don't want people to stare at the kitchen pass-thru. But I felt like this small view of the kitchen almost invites people to stare at it and wonder why it's so small. Even if the frame was painted silver (as I feel like most of those are silver) I think it looks like some weird photo the restaurant owner decided to have framed and hung on the wall, and not like a kitchen pass-thru.
Friend suggested I just put a faux door to give the illusion of a doorway to the kitchen. But that wasn't thrilling me either. Then came the light bulb! It is a small diner: only 2 booths and a lunch counter for 3. They would have just a small kitchen. So why don't I create one on the back wall? Last night I gathered my supplies...
 |
| Wood scraps, rulers, and my handy I-drill |
Started cutting. Made basic shape...
 |
| Shelves above for plates and food warmer; space below for fryers and grills |
 |
| Adding some small trims to clean up the edges and dress it up a bit |
 |
| Still needs work, but almost there.... |
It still needs sanding and to be spray painted silver, but it's looking decent! Also, the name (Raw Rooster Country Kitchen) was really bothering me: eggs are not raw chickens nor do they come from roosters; so instead, no matter what name I use, it sounds like the diner serves uncooked meat or something. Changed it to "Crazy Chickens Country Kitchen" which is surprisingly difficult to say. Plus the decor has all sorts of poultry themed items: roosters, chickens, hens. So neither "Rooster" nor "Chicken" Country Kitchen is going to be 100% accurate. I know, I know: I'm really OCD'ing and overthinking this. Who knew naming a place could be so involved? LOL.
Then Friend saved the day with "Cluckers Country Kitchen", or as we have begun to nickname it: "Mother Cluckers".
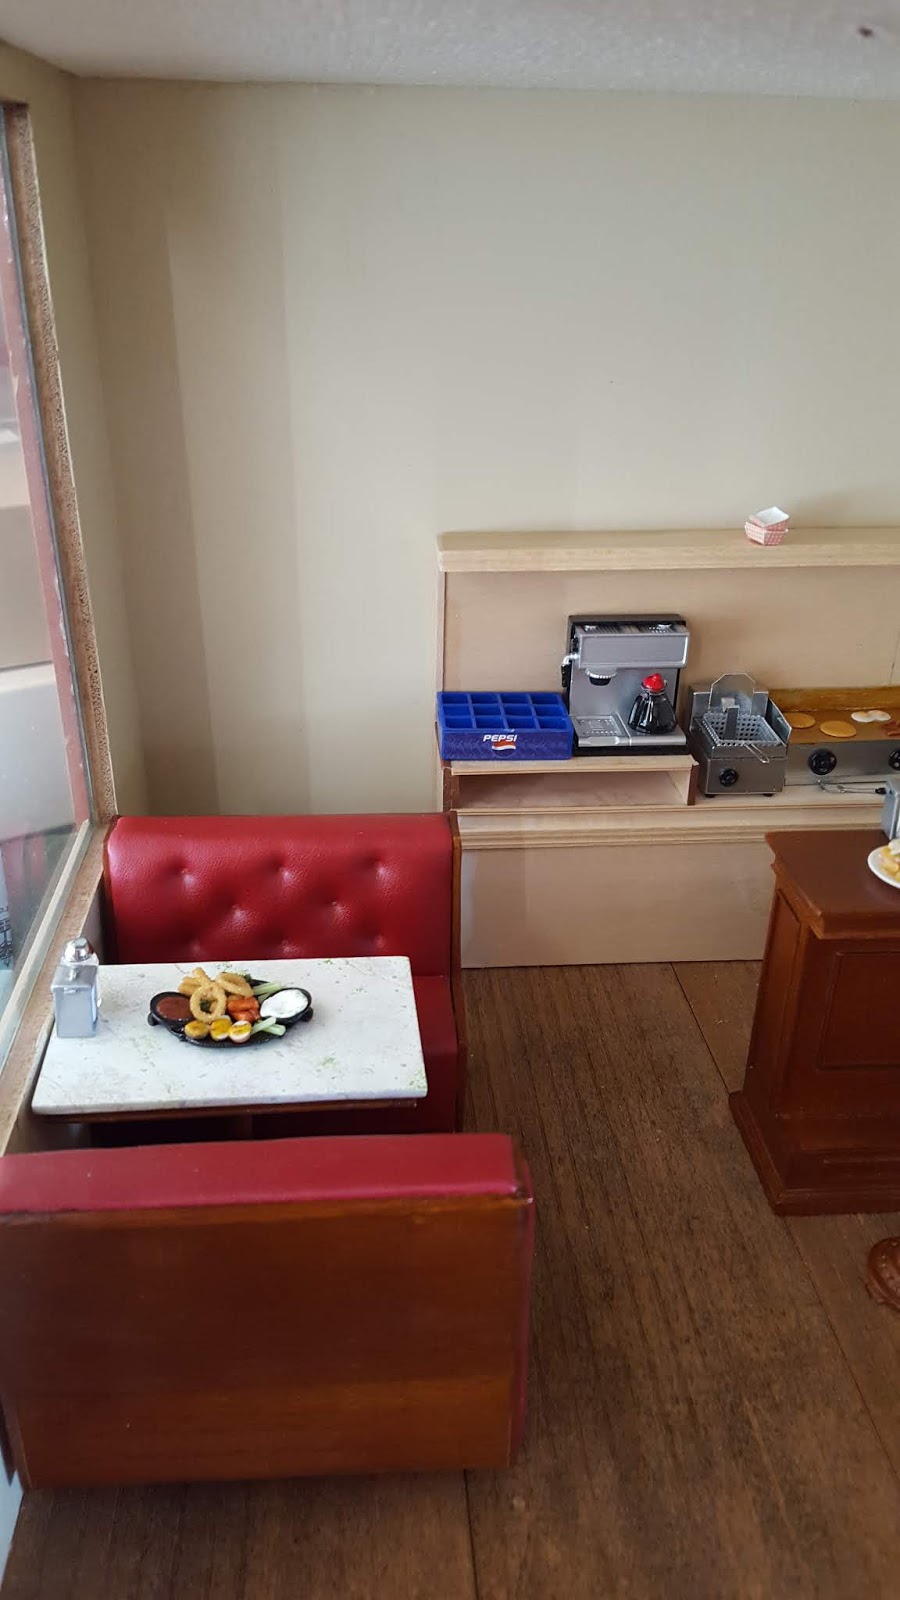
So counter is in place and filled with some diner type items...
Blue Pepsi crate is a space holder for a soda dispenser I will have to make or find one to purchase. And I need to get some mustard and ketchup squirt bottles to go next to the napkin holders.
This roombox is a front-opening shop that had a shelf connected to the front window. I spent one evening during the week removing that shelf so a booth set would fit in the space instead:
 |
| Shelf was too low to be a counter so it had to go; made my line and started to cut |
 |
| Front window glass was glued to it though so I couldn't cut shelf completely out without scratching or breaking the glass |
 |
| Covered with trim to hide my messy cut |
 |
| Roombox now has a booth in the front opening window space |
 |
| View looking in the side window; sorry for the glare/reflection |
 |
| View thru the front door |
 |
| View looking in front window |
 |
| That back corner will get a very narrow counter |
There is some dead space behind the booth and next to the cooking counter. Will put a narrow counter back there with a register and to-go bags (for the diner's booming take-out business). Waitress/Cook better be skinny to fit between the booth and the counter - s/he will only have about a foot of space (1") to squeeze thru once counter is in place. LOL
So Mother Cluckers still needs a lot of work before she's ready to open for business. Back counter needs to be painted metallic silver; narrow counter and soda dispenser needs to be purchased/made; walls need to be papered; and top 2" of the walls will get a shelf for chicken/hen/rooster themed stuff to decorate the diner (I believe it is called "flair").
 |
| Wallpaper has been chosen but couldn't be installed until I had back counter/kitchen area issue resolved |
And, most importantly, I need to address the electrical components: I have to make the chicken/rooster themed chandelier and wire in the LEDs to the back counter to be the food warmers. So we will visit this diner again later on in the month! Until then: Thanks for stopping by! Come back again soon!
(P.S. Please note my extreme restraint: there was not one pun made using the word "egg" or egg-related terms (such as "scrambled")! Aren't you all so proud of me?)