Welcome to my life . . . .

This is a blog about my passion: dollhouses and miniatures. This particular blog was started to follow my miniature dream: to create a Victorian Mansion. But work on my Mansion is slow. Very slow. Sloth slow. Ice Age glacier movement slow. Why? Because I am easily distracted by other personal miniature projects (I have 50+ roomboxes and 15 dollhouses in various stages of incompletion) and because I work for a miniature shop and am often up to my elbows in miniature projects that aren't mine! So, I thought, some artists work in a particular medium (woods, watercolors, clay, oils, etc.), I work in progress . . . .

Monday, February 15, 2016

Library's Lower Ceiling Complete!

Mother Nature listened to my request (sort of): I asked for another snow week and she gave me a snow day.  Close enough!  It was enough to get me started on my Library's Lower Ceiling.  I started by making a template of the ceiling space (I love templates that allow me to work outside the dollhouse).  I wanted something mostly white (so as to not detract from the main focal points in the room, which are the bookcases and Second Story Ceiling).  But a plain white ceiling would have been, well, plain.

So to coordinate with the larger, grander, Second Story Ceiling (Library Second Story Ceiling) I had picked out these panels by North Eastern Lumber (a different company than North Eastern Models which I am sad to say is closing it's doors after 70 years in business!) and I had planned to put them straight across the ceiling like so:
6 panel sheets laid end to end across ceiling
But, with the floor being so busy and the bookcases having a lot of different books (thus appearing busy to the eye at first glance), I was worried that this would be too busy of a ceiling, even if it were just painted white.  Plus my late night decor consultants (Mom and my best friend Julie) advised that lower ceiling should have a touch of gold to it to coordinate it with the room better.

I broke the panels up to match the 4x4 square grids like the Second Story Ceiling had and I inserted strip wood between the panels to also replicate the Second Story Ceiling.
Dry fitting on my template

Wasn't happy with my dry fit.
My major concerns with the dry fit was that the front edge (which is seen from the open end of the dollhouse) was not trimmed out whereas the back (which is mostly hidden by the fireplace and bookshelves) was neatly spaced.  So I removed the trim from the back and moved it towards the front.  And I laid the crown molding on it to see how it would look with the spacing.
My decor advisers still insisted the ceiling was too plain and trims were needed.  Get me some gold trims, STAT!  So I experimented with different woods and settled on a flat chair molding.  I would box in each 4x4 panel (similar to the Second Story Ceiling) and create a grid network across the ceiling.  But how to meet up the edges of the grid?  I could just butt them up flush to each other (quick, simple, easy) or I could cut each strip into 45-degree angles (time consuming but looks more finished):
Grid lines butted up to each other

Grid lines mitered cut to each other
I really liked the mitered cut look so that is what I did.  Until I got to the edges of the ceiling.
The strips fall off into nothing.  How do I bring the strips to an end?  I tried notching out a piece but it looked horrible (didn't even photograph it) as the angle cut arrow edge strips didn't fit nicely into the notches I had made.  I tried just bringing the strips to the edge and cutting it flat:
But it looked unfinished with those gaps just sitting there (pointed out by the arrows in the photo above).  I tried cutting small knobs to anchor the strips into a longer strip, but they looked like little pimples on the trim:
Decor Consultant Mom recommended framing out the ceiling with the flat chair rail but don't angle cut any of the framing -- only butt up to it.  So I tried that and it looked good enough that I went with it!
Now that I was fairly content with my dry fit, I removed the trim pieces and painted them gold (along with the crown molding), glued down the panels and strip wood, and I spray painted the ceiling white:
Spray painted a gloss white
Gave it 2 coats and then thought it couldn't hurt to have a 3rd coat.  What a mistake.  Because either the 20-degree weather outside where I gave it a quick spray for the 3rd coat or because I was rushing (due to the cold) and sprayed too close to the project, but ripples and bumps appeared in the paint in numerous, various, places on the ceiling about 15 minutes after I sprayed:

They were very faint and I considered just going with it.  But I knew eventually it would bug me.  So I took out very fine sand paper and a bottle of paint thinner and got started removing the imperfections.  After a bunch of scrubbing with rags dipped in paint thinner and lightly sanding spots, the majority of the ripples/textured spots were gone and the ceiling was ready for another, final coat of white paint.
I inserted the ceiling into the house and glued the crown molding to the ceiling template.  After removing the ceiling from the house it became apparent to me how the room was not square at all.  Oh, well.  I didn't know exactly where the crown molding would be when making my dry fit so some of the grid pieces needed to be trimmed up once the crown molding was glued in place.  Once trimmed up, I fit in and glued down the gold trims.
It was ready to be officially glued into the Library!
It is a nice little ceiling that would have been lovely for a cozy, yet elegant, room.  But this room is not just a cozy little elegant room: it is a two story library so....
View of whole room with both ceilings, with flash on the camera
View of whole room with both ceilings, no flash
I am now gluing on the "wrought iron" railings and spiral stair.  Then baseboards and bookcases/fireplace get returned to their spots.  Eventually windows and window trim will be inserted and curtains made and this room (rooms?) will be done!

Thanks to Valentine's Day and President's Day (no school for the kids), I was also able to fit in time to do the Kitchen floor and crown molding in the Lady's Sitting Room:
Kitchen area
My servants' areas will have terrazzo floors.  Terrazzo (invented by the Venetians in the 1500s) is a cement based floor made by embedding small pieces of marble or granite in mortar and then polishing.  Or, like they did at the Elms in Newport, even crushed sea shells and pebbles can be used in the mosaic-like topping of the floor. At first I was going to spray paint the floor with one of those stone looking sprays and polyurethane it to look like terrazzo.  But then my sister gave me a roll of some contact paper drawer liners she had purchased for her new townhouse, and PRESTO! My servants got a quick and easy terrazzo floor for the kitchen, servant's dining room, and laundry room!

I have been avoiding putting the 4th floor on the house because the angles of the bay rooms have intimidated me.  I had flashbacks to my attempts to put crown molding in the customer's Harborside Mansion (Crying Over Harborside Mansion) so I wanted to be able to see all around the angles and crown molding while cutting and fitting them.  Therefore, the 4th floor has never been glued onto the house.  But, of course, since I planned this out so carefully, the trims cut without issue and fit great:


So...updated photos of the library (once baseboards, rails and stairs are glued in and bookcases are returned) will be posted in the near future.  But for now, I'm taking a hot chocolate or coffee break!  Thanks for the snow, Mother Nature!

Saturday, January 30, 2016

Snow Days Library Stairs!

For a town that freaks out when we get 5" or more of snow, to be hit with 36" means we shut down for almost a week.  Stuck at home with nothing to do: NEVER!  I have a mansion to work on (and 3 young kids who need hot chocolate, snow pants put on and off, and a driveway/sidewalk that need shoveling, and a dog who, it turns out, is afraid of windy snow gusts and needs a path shoveled so she can do her business)!

But in between the various snow related activities, I put together the library spiral stair case!  It is a special order spiral staircase kit by Alessio.  He makes a (nicer, IMO) spiral staircase kit but it takes up 5" diameter of space in the house.  I only had 4" diameter of space I could spare for the stairs so I contacted him and requested this kit be made to only take up the smaller diameter.  The treads aren't as finely detailed as his 5" diameter steps which have a pretty design on them (as opposed to mine that have two rows of square holes), but this kit met my important criteria of 4" diameter -- plus I have a pretty scroll work railing for it so that will dress it up.  I had carefully dry fit it together, sanding and whittling down the spindle posts that were too fat to fit thru the appropriate holes, and positioned it in the house and it was perfect!  So I disassembled the dry fit and broke out the glue!
Moving right along!
With a cozy fire crackling and kids playing their newest favorite card game (Exploding Kittens), I glued the staircase together in less than an hour!  And put it in the house to make sure the top step reached the floor of the second level library:
No, no, no, no, NO!
To discover that I had assembled the darn thing reversed!  It needs to spiral the opposite way so the top step rests where the black arrow is in the photo, not where it currently is!  When I disassembled the dry fit I must have put the pieces upside down and when I picked them back up to add glue, it changed the direction of the spiral!  Craptastic.

Luckily, our cozy fire in the other room had the house at a lovely 76-degrees (F) so the glue was not set yet.  I could wiggle the parts all back off!  After some sanding of dried glue bits and gluing 2 broken steps back together, I was ready to begin again . . .
Round 2: Murphy's Law - 1; Me - 0.
Spiraling the correct way now...
YAY!  I did it correctly this time!
Now to add my pretty scroll work railing!  However, I didn't like the fork-y looking sticks that came with Alessio's stair kit.  At first I was thinking they would offer support for my pretty scroll work curved railing.  But when I held the curved railing up to the sticks, the sticks disrupted the scroll design.  So I had to cut all the sticks off the stairs...
Sticks all trimmed off
Dry fit of scroll work railing
The railing would be glued to the very edge of the steps and to small balusters at the top and bottom of the steps.  Luckily the laser cut scroll work railing had been wrapped around a mailing tube for months now so the warped curve is pretty much set in place!
Set in to the room - it's a good fit!
Now it was ready for paint!
Painted and with all railing in

More Railing
I have to still do the lower ceiling and add crown moulding, baseboards, and trims so I did not glue the railings or stairs in place (they are just held temporarily with FunTak).  And that is why the fireplace and other bookshelf are missing from the back wall on the first floor: can't work on the ceiling with those in there.  But the Mansion's 2-story Library is just about complete!  Another snow storm that keeps me home for almost a week would do it (Can you hear me, Mother Nature?).


Friday, January 15, 2016

Porch Repair

This Celerity manufactured "Old Homestead" project has been hanging around at work -- a quick and easy porch and shingle repair for a customer.  The dollhouse belongs to her 107 year old mother but it was damaged in moving.  We just did a little repair and it's good to go!

House had several broken or missing shingles, the front porch was completely broken off, most railings were broken to bits, the front door was broken off it's hinge, and some trim pieces were snapped off:
House BEFORE
House AFTER
The front porch was so cute!  I am really glad we were able to salvage it....
Porch BEFORE was in sorry shape
Porch AFTER

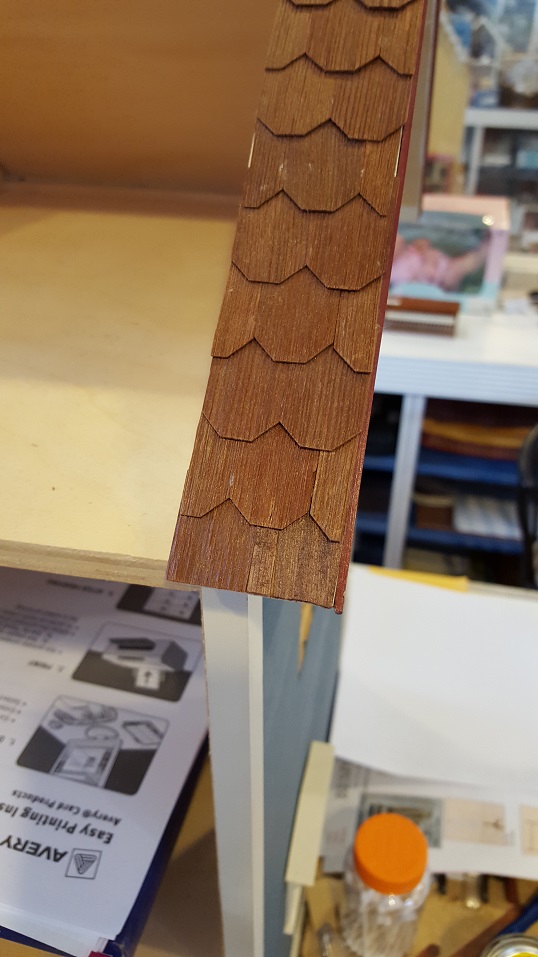
Several shingles on the first row were broken or missing; we replaced them

Eaves BEFORE: so many shingles were missing chunks like this one
Eaves AFTER: All fixed
Side BEFORE: A few broken shingles on the first row
Side AFTER: Shingles are all trimmed up
Waiting for customer to pick up this project and then we're on to the next!


Wednesday, January 13, 2016

Library Floor

After much deliberation I settled on a library floor!  Brodnax Parquet Leman's Flooring in walnut and cherry.  The only problem was that I didn't like the walnut wood against the mahogany:

More wood stains?!?!?
Although I don't want all the wood stains in the room to be exactly the same, I also don't like having a random wood thrown in there: the cherry picks up the gold in the frame and wallpaper and I liked the pattern of the cherry and walnut (as opposed to the walnut/walnut pattern on the right).  But the walnut doesn't seem to "pop" out like I wanted it to.  Even polyurethaning them didn't seem to help much:
Left are out of the bag; Right are polyurethaned
Still not impressing me.  They seem so dull.  And it doesn't tie in to anything else in the room.  I really wanted a mahogany floor, but with so much mahogany wood already in the room I didn't want to have such a dark, "match-matchy" bookcase/floor statement.  It would all blend together and be a mahogany blah.

Then my mother suggested staining the walnut pieces.  Interesting -- why did I assume I had to keep the walnut pieces exactly as they were out of the bag?!?!?  I hate when I forget to think outside the bag.  Don't tell my mother I said this, but she's a genius!
I like the walnut pieces so much better now.  They have a richness that they lacked before.  They do not match the bookcases (for which I am thankful because I didn't want everything to match), but seem to coordinate well enough that they won't look out of place.

So I spent two days staining little octagon pieces....
Day 1 and I have 1/3 of the pieces stained
Now they are all drying so I can start assembling my floors (now I just need a snow day or two so I get the time to do it)!


Saturday, December 12, 2015

Just About Done: Brick House

I am waiting on house numbers and the outside coach light next to the door, but otherwise, the Brick house is all finished!
House Before
Another Before Photo
So customer had dropped off a house that someone had built for her to look like a real life townhouse.  She wanted it finished to resemble the house . . .
Real life house
Real life house
So, after magic brik and shingling and gluing on shutters and kickplate, the house is looking more like the photos the lady brought in:
House from front

House all done
The only difficult aspect of shingling this house was on the back.  The house was custom built and the builder had curves on the back of the roof.  Thus we had to trim the shingles accordingly...


So house will be done by next week...There is very little space between the front door and column so the usual house numbers we use on projects will not fit well.  My dad is cutting numbers for me on a laser cutter and once I get them I can make sure the spacing is right for coach light and install them.  This house will be ready ahead of deadline for the customer to get!